As an audiophile, you know how important it is to take care of your headphones. Not only do they deliver the sound you love, but they’re also a big investment. To make sure they last as long as possible, you need to keep them clean. Here’s a guide to the best headphone cleaning tools to keep your headphones in top condition.
The Importance of Cleaning Your Headphones Regularly
Headphones, like any other item that comes in close contact with our bodies, can harbor bacteria, sweat, and dirt over time. Here’s why it’s essential to keep them clean:
Hygiene Concerns
The warm and moist environment created by wearing headphones for extended periods provides an ideal breeding ground for bacteria. Regular cleaning helps prevent the buildup of germs and reduces the risk of ear infections.
Preventing Ear Infections
Unclean headphones can lead to ear infections and discomfort due to the accumulation of dirt, wax, and bacteria in the ear canal. Cleaning your headphones regularly can help maintain ear hygiene and prevent such issues.
Enhancing Sound Quality
Accumulated dirt and debris on headphone components, such as ear cups and drivers, can affect sound quality by obstructing sound pathways or causing distortion. Cleaning your headphones ensures optimal audio performance and preserves the integrity of the sound.
Common Issues Caused by Dirty Headphones
Dirty headphones aren’t just a nuisance; they’re a breeding ground for a host of problems that can disrupt your audio experience and compromise your well-being. Here are some common issues caused by neglected headphones:
Reduced Sound Quality
Dirt and debris can accumulate in the drivers or vents of your headphones, obstructing sound pathways and resulting in diminished audio quality.
Unpleasant Odor
Bacteria thrive in the warm, moist environment of dirty headphones, leading to foul odors that can linger and affect your listening experience.
Skin Irritation and Infections
Prolonged contact with unclean headphone surfaces can irritate the skin and increase the risk of infections, particularly in sensitive areas like the ears.
Component Damage
Abrasive particles present in dirt and grime can scratch or damage delicate headphone components, potentially affecting their performance and longevity.
Types of Headphone Cleaning Tools
When it comes to keeping your headphones pristine, having the right cleaning tools at your disposal is essential. Fortunately, there’s a wide array of options available to suit every cleaning preference and headphone type.
Dry Cleaning Tools
For dry cleaning, consider using:
Soft-bristled brushes
These brushes are perfect for gently sweeping away loose debris and dust from headphone surfaces, ensuring a scratch-free clean.
Compressed air cans
Harness the power of compressed air to effectively dislodge dust from those tricky-to-reach crevices and vents, maintaining optimal headphone hygiene.
Microfiber cloths
Engineered to delicately clean surfaces without leaving scratches or lint behind, microfiber cloths are a must-have for maintaining the pristine appearance of your headphones.
Wet Cleaning Tools
For deeper cleaning, wet cleaning tools are indispensable:
Isopropyl alcohol wipes
These wipes are not only effective for disinfecting headphone surfaces but also excel at tackling stubborn stains, leaving your headphones looking and feeling fresh.
Cotton swabs
Perfect for precision cleaning, cotton swabs are invaluable for reaching intricate areas like ear tips and around the drivers, ensuring no dirt or grime is left behind.
Cleaning solution
A blend of mild soap and water provides the perfect solution for tackling more stubborn dirt and grime, particularly on headphone cushions and bands, restoring them to their former glory with ease.

Credit: www.amazon.com
Headphone Cleaning Tools: Elevate Your Hygiene Game
Now that we understand the critical importance of maintaining clean headphones, let’s delve into the world of headphone cleaning tools. It’s not just about cleanliness; it’s about elevating your listening experience to new heights with a comprehensive arsenal of cleaning solutions tailored to your needs.
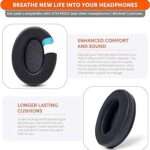
Microfiber Cloth: The Gentle Giant
At the forefront of headphone cleaning essentials is the trusty microfiber cloth. Soft, lint-free, and ultra-absorbent, these cloths are your go-to for wiping away dust, fingerprints, and smudges without risking scratches or damage. With just a dab of water or a mild cleaning solution, watch as your headphones sparkle with renewed brilliance.
Cleaning Solution: Power in Precision
For those stubborn stains and grime that refuse to budge, a high-quality cleaning solution is your secret weapon. Opt for alcohol-free formulas specially crafted for delicate electronics, ensuring a thorough cleaning without compromise. Gently apply the solution to your microfiber cloth and let its precision unleash the true potential of your headphones.
Soft Bristle Brush: Delicate Yet Determined
Navigate the nooks and crannies of your headphones with finesse using a soft bristle brush. Designed to dislodge dirt and debris without leaving a trace, these brushes are your ticket to a spotless finish. From ear pads to hinges, no corner goes untouched, ensuring every inch of your headphones receives the care it deserves.
Compressed Air Duster: Power in Every Burst
Experience the power of cleanliness with a can of compressed air duster by your side. With a quick burst, watch as dust and debris vanish into thin air, leaving your headphones refreshed and revitalized. Handle with care, and let the controlled bursts unleash a symphony of cleanliness upon your cherished audio companions.
Ear Wax Removal Tool: Precision meets Purity
For in-ear headphone enthusiasts, ear wax buildup is a common foe. Fear not, for the ear wax removal tool is here to save the day. With soft, flexible tips designed to navigate the intricate pathways of your headphones, bid farewell to ear wax woes and revel in a pristine listening experience once more.
UV-C Sanitizer: Germ-Free Guarantee
For the ultimate in headphone hygiene, embrace the power of UV-C sanitization. Harnessing the might of ultraviolet light, these compact devices obliterate bacteria, viruses, and other pathogens on contact, leaving your headphones gleaming with purity. It’s not just about cleanliness; it’s about peace of mind knowing your headphones are as germ-free as can be.
How to Clean Your Headphones
Now that you have the necessary tools, let’s dive into the step-by-step process of cleaning your headphones:
Preparing Your Workspace
Before you begin cleaning, gather all the required tools and materials, including the cleaning solution, cloths, brushes, and compressed air. Ensure you have a clean and clutter-free workspace to work in, preferably away from dust and debris.
Cleaning Ear Cups
Remove the ear cushions and wipe them down with a damp cloth or alcohol wipe. Use a soft-bristled brush to remove any debris trapped in the vents or crevices.
Cleaning Headband
Gently wipe down the headband with a damp cloth or alcohol wipe, paying attention to any stains or buildup. Avoid applying excessive pressure to prevent damage to the padding or frame.
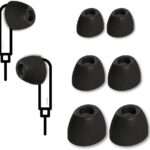
Cleaning Ear Tips
Remove the ear tips from the earpieces and soak them in warm, soapy water for a few minutes. Rinse them thoroughly and allow them to air dry before reattaching them to the headphones.
Cleaning the Audio Jack
To clean the audio jack of your headphones, use compressed air to blow away any dust or debris that may have accumulated inside. Be sure to hold the headphones upright to prevent any loosened debris from falling further into the jack.
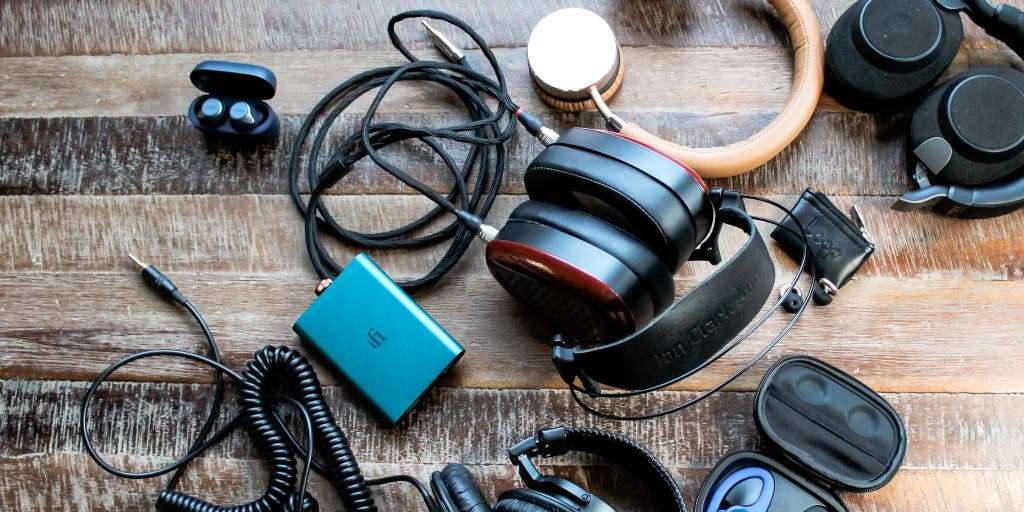
Credit: www.nytimes.com
Tips for Effective Headphone Cleaning
Now that you’re familiar with the essential headphone cleaning tools, here are some tips to ensure that your cleaning efforts are effective and safe:
Read the Manufacturer’s Instructions: Before cleaning your headphones, always refer to the manufacturer’s instructions and guidelines. Different headphone models may have specific cleaning recommendations to ensure optimal performance and longevity.
Avoid Excessive Moisture: When using cleaning solutions or damp cloths, be careful not to saturate the surfaces of your headphones with excess moisture. Water and electronics don’t mix, so use a light touch and wipe away any excess liquid immediately.
Take Your Time: Cleaning your headphones may seem like a simple task, but rushing through it can lead to accidental damage or ineffective cleaning. Take your time, be gentle, and pay attention to detail to ensure thorough and safe cleaning.
Regular Maintenance: Make headphone cleaning a regular part of your maintenance routine to prevent dirt and grime from building up. A quick wipe-down after each use can go a long way in keeping your headphones looking and sounding their best.
Tips for Maintaining Clean Headphones
To prolong the cleanliness of your headphones, consider the following tips:
Proper Storage
Your headphones should be stored out of direct sunlight and moisture while not in use. Avoid wrapping the cables tightly around the headphones, as this can cause damage over time.
Sharing Headphones
Avoiding the sharing of headphones is crucial for safeguarding your health and well-being. By refraining from sharing headphones with others, you minimize the risk of bacterial transmission. Protect yourself and those around you by keeping your headphones exclusively for personal use.
Regular Cleaning Schedule
Establish a routine cleaning schedule to keep your headphones in top condition. Depending on usage frequency and environmental factors, aim to clean your headphones at least once a month or more frequently if necessary.
Avoiding Exposure to Extreme Conditions
Avoid exposing your headphones to extreme temperatures, humidity, or moisture, as these can damage electronic components and degrade audio quality. Additionally, refrain from using harsh cleaning agents or abrasive materials that may scratch or discolor your headphones.
Protective Case
Use a protective case when transporting your headphones to prevent them from getting dirty or damaged.
Conclusion
In conclusion, headphone cleaning tools are essential for maintaining the cleanliness, performance, and longevity of your beloved audio gear. From microfiber cloths and cleaning solutions to soft bristle brushes and UV-C sanitizers, there’s a wide range of tools available to suit every need and preference.
By incorporating regular cleaning into your headphone maintenance routine and using the right tools and techniques, you can ensure that your headphones stay sparkling clean and deliver top-notch sound quality for years to come.
So don’t wait until your headphones are covered in grime – invest in the right headphone cleaning tools today and keep your audio gear looking and sounding its best!
Frequently Asked Questions Of Headphone Cleaning Tools
How often should I clean my headphones?
It’s recommended to clean your headphones at least once a month or more frequently if you use them daily or in sweaty environments.
Can I use alcohol wipes on all types of headphones?
While alcohol wipes are generally safe for most headphone surfaces, it’s best to check the manufacturer’s guidelines to ensure compatibility.
Is it safe to use compressed air cans on headphones?
Yes, compressed air cans are safe for cleaning headphones, but avoid holding them too close to the headphones to prevent damage from the air pressure.
Can I wash my headphone cushions in a washing machine?
Most headphone cushions are not machine washable and should be cleaned by hand using mild detergent and water.
How can I prevent my headphones from getting dirty?
To prevent dirt buildup, store your headphones in a clean, dry place, and avoid using them with dirty or oily hands.
What should I do if my headphones get wet?
If your headphones get wet, gently pat them dry with a soft cloth and allow them to air dry completely before using them again.

A passionate tech blogger and the founder of Best Tech View, a dynamic platform dedicated to all things technology. With a keen interest in the tech, Ahmad strives to provide insightful and engaging content on the latest tech trends, and breakthroughs.